In this workshop will explore two commonly used multivariate methods for ordination and visualization: principal components analysis and simple correspondence analysis.

We will also explore a more advanced method, the convolutional neural network (CNN), for classification of images. The goal is not to perfect a CNN in this workshop, but to show you that this can be done in R and to give you a sense of how it works. It is essential that you learn about what a CNN is and gain some intuition for how it works before trying this exercise. I can recommend a couple of youtube videos for this: 3Blue1Brown and Brandon Rohrer. Watch them in advance of the workshop, maybe twice.


Leaf economics spectrum

The Leaf Economics Spectrum (LES) is based on the idea that leaf lifespan and other leaf traits of plant species are correlated across a wide continuum of strategies for acquiring resources. The spectrum was first discovered and described using principal components analysis on a large data set of leaf traits amassed by Wright et al (2004, Nature 428: 821-827). The data set includes 2,548 species from 219 families and 175 sites, although there are many missing values for some leaf variables. A subset of the variables in their data set can be downloaded here. The file contains the following variables:

  • Dataset
  • BIOME
  • Species
  • GrowthForm (epiphyte E, fern or fern ally F, grass or sedge G, herb H, shrub S, tree T, vine, twiner or liana V)
  • Decid_Evergreen: deciduous D or evergreen E
  • Needle_Broadleaf: needleleaf N or broadleaf B
  • C3C4: C3 or C4 photosynthesis
  • N2_fixer: nitrogen fixer (Y or N)
  • logLL: log10 of leaf lifespan in months
  • logLMA: log10 of leaf mass per area in g/m2
  • logNmass: log10 of leaf nitrogen per unit dry mass in %
  • logPmass: log10 of leaf phosphorus per unit dry mass in %
  • logAmass: log10 of photosynthetic capacity (photosynthetic assimilation rates measured under high light, ample soil moisture and ambient CO2) in nmol/g/s
  • logRdmass: log10 of dark respiration rate per unit dry mass in nmol/g/s

Download the data set and carry out the following analyses.

  1. Read the data from the file and inspect the variables.

  2. Use pairwise scatter plots to examine associations among the 6 continuous variables. Which variables are most strongly correlated with one another? Which traits are positively correlated with leaf lifespan (log10LL). Which traits are negatively correlated with leaf lifespan?

  3. Carry out a principal components analysis on the six log-transformed continuous variables. Note that any case having at least one missing variable will not be included. How many cases were included in the analysis?

  4. You can see from your pairwise scatter plot in (2) that the variable logRdmass has the most sparse data. Redo the PCA leaving this variable out. How many cases did you include this time?

  5. From (4) we can see that we still are missing a lot of cases, but let’s proceed with what we have. Examine the proportion of variance explained by each principal component. How may principal components are there? What proportion of the variance is accounted for by the first principal component? How many components are needed to capture 95% of the total variance among species*?

  6. What are eigenvalues? Create a scree plot to visualize the magnitudes of the eigenvalues.

  7. Create a biplot to visualize the contribution of traits to the first two principal components. For this analysis, PC1 is the “Leaf Economics Spectrum”. What continuum of leafs traits does it describe: what other traits do long-lived leaves possess, in general, in contrast to short-lived leaves?

  8. What are eigenvectors? Compare the eigenvectors for the first two principal components with the previous biplot. Which variables contribute positively to the first two principal components? Which contribute negatively?

  9. Save the scores for the first two principal components to your original data frame and plot them in a scatter plot.

  10. (Optional) Plot the first two principal components and color the points according to the variable Decid_Evergreen. Do you see a pattern? You would already have predicted that deciduous leaves would be short lived compared with evergreen leaves. A third color indicates cases where the category is missing. Can you predict from this graph whether they are likely to be mainly deciduous or evergreen?

* 5 (There will be as many principal components as original variables in the analysis, except under special circumstances); 68.7%; 4

Answers

library(ggplot2)

# 1. Read and inspect
leaf <- read.csv(url("https://www.zoology.ubc.ca/~bio501/R/data/LES.csv"))
head(leaf)
##          Dataset BIOME                  Species GrowthForm Decid_Evergreen
## 1 Ackerly_Jasper WLAND  Adenostoma fasciculatum          S               E
## 2 Ackerly_Jasper WLAND        Arbutus menziesii          S               E
## 3 Ackerly_Jasper WLAND Arctostaphylos tomentosa          S               E
## 4 Ackerly_Jasper WLAND    Artemisia californica          S               D
## 5 Ackerly_Jasper WLAND      Baccharis pilularis          S               E
## 6 Ackerly_Jasper WLAND       Ceanothus cuneatus          S               E
##   Needle_Broadleaf C3C4 N2_fixer logLL logLMA logNmass logPmass logAmass
## 1                N   C3        N  1.26   2.45    0.069   -0.932     1.69
## 2                B   C3        N  1.17   2.19    0.094   -0.923     1.86
## 3                B   C3        N  1.35   2.15    0.014   -0.994     1.88
## 4                B   C3        N    NA   1.98       NA       NA       NA
## 5                B   C3        N  0.95   2.03    0.388   -0.824     2.21
## 6                B   C3        Y  1.17   2.36    0.255   -0.962     2.00
##   logRdmass
## 1        NA
## 2        NA
## 3        NA
## 4        NA
## 5        NA
## 6        NA
# 2. Pairwise scatter plots. All correlations are positive.
pairs(leaf[, 9:14], pch = ".", cex = 2, col = "Firebrick")

# 3. Principal components analysis
z <- prcomp(~ ., data = leaf[, 9:14], na.action = na.exclude) 

# Number of non-missing cases
table(!is.na(z$x[, "PC1"]))
## 
## FALSE  TRUE 
##  2476    72
# 4. PCA excluding dropping logRdmass
z <- prcomp(~ ., data = leaf[, 9:13], na.action = na.exclude) 
table(!is.na(z$x[, "PC1"]))
## 
## FALSE  TRUE 
##  2377   171
# 5. Proportion of variance explained
summary(z)
## Importance of components:
##                           PC1    PC2     PC3    PC4     PC5
## Standard deviation     0.4707 0.2371 0.14494 0.1193 0.09808
## Proportion of Variance 0.6867 0.1742 0.06512 0.0441 0.02982
## Cumulative Proportion  0.6867 0.8610 0.92608 0.9702 1.00000
# 6. Scree plot.
screeplot(z, type = "line", col = "firebrick", main = "Leaf PCA")

# 7. Biplot
biplot(z, cex = 0.5, las = 1)

# 8. Eigenvectors
z$rotation
##                 PC1        PC2         PC3         PC4         PC5
## logLL    -0.6019831 -0.3578171  0.71330710  0.01250569  0.02489712
## logLMA   -0.3930614 -0.2364764 -0.46503458  0.75606019  0.04119997
## logNmass  0.2711242 -0.2515658  0.13065889  0.19165968 -0.89966722
## logPmass  0.4488409 -0.8208048 -0.04373717 -0.06901514  0.34372267
## logAmass  0.4562374  0.2811403  0.50591613  0.62186822  0.26483262
# 9. Scores for the first two principal components
leaf[, c("PC1","PC2")] <- predict(z)[, 1:2]

ggplot(leaf, aes(PC1, PC2)) + 
    geom_point(size = 2) + 
    theme_classic()
## Warning: Removed 2377 rows containing missing values (`geom_point()`).

# 10. Evergreen vs deciduous leaves
ggplot(leaf, aes(PC1, PC2, colour = Decid_Evergreen)) + 
    geom_point(size = 2) + 
    theme_classic()
## Warning: Removed 2377 rows containing missing values (`geom_point()`).


Rodent ordination

Correspondence analysis is used to ordinate species assemblages based on species composition and similarity in species abundances. The data for this exercise are rodent species abundance from 28 sites in California (Bolger et al. 1997, Response of rodents to habitat fragmentation in coastal Southern California, Ecological Applications 7: 552-563). The file in contingency table format is located here. I modified the data table downloaded from the web site of Quinn and Keough (2002, Experimental Design and Data Analysis for Biologists, Cambridge Univ. Press, Cambridge, UK).

The 9 species are indicated by variable (column) names. Genus abbreviations are: Rt (Rattus), Rs (Reithrodontomys), Mus (Mus), Pm (Peromyscus), Pg (Perognathus), N (Neotoma) and M (Microtus). Rattus and Mus are invasive species, whereas the others are native.

  1. Download the file and read into a data frame in R. Inspect the data frame to get a sense of which species are abundant and which are rare, which are widely distributed and which occur infrequently. The first column of this data frame will have the site variable. Make sure not to include the site variable in the correspondence analysis. Also, the plots will use the row names of the data frame as the site names. If you want to see the actual site names rather than row numbers in your plots, rename the row names accordingly.

  2. Carry out a correspondence analysis using these data. Extract two axes from the species abundance data at sites. How strongly are the site and species data correlated along the two axes?

  3. Plot the results from (2). Overlap of points may make it difficult to identify some plots and species (unfortunately there’s no built-in “jitter” option for this plot). You can use the species scores to help identify them.

  4. Use the plot in (3) and the species scores to interpret the results of your analysis. How are each of the species contributing to the correspondence axes? Do you notice any differences between the invasive and native species in their distributions?

  5. As you probably surmised, the results of the first round of analysis were chiefly driven by the introduced species. To examine the native species as well, create a new data frame with Rattus and Mus deleted. This will generate some sites with no species present. Delete these sites from the new data frame.

  6. Carry out a correspondence analysis on the native species. Extract two axes from the species abundance data at sites. How strongly are the species and site data correlated?

  7. Plot the results from your analysis in (6). Is the plot useful in helping you to identify which species tend to co-occur? And which species tend not to occur together? Confirm this by looking at the original data. Are your interpretations correct?

  8. Based on the plot in (7), which sites tend to have similar species composition and abundances? Which have different species assemblages? Confirm this by looking at the original data.

  9. Based on the same plot, can you match the species to specific sites? Confirm this by looking at the original data. It would be easier to compare the plot of the correspondence analysis with the abundance data in the data frame if the rows and columns of the data frame were reordered according to the position of sites (rows) and species (columns) along the first axis from the correspondence analysis. Print the data frame with this reordering. The positions of the sites and species along the first axis are given in the first columns of the rscore and cscore matrices in your correspondence model object. Your results should look like the following:

            N.lepida Pm.eremicus M.californicus Rs.megalotis Pm.californicus N.fuscipes Pg.fallax
Sandmark           8          65              3            9              57         16         2
Altalajolla       12          35              2           12              48          8         2
Katesess           0          21              0           11              63         16         0
Delmarmesa         0           1              0            0              10          1         0
Florida            0           1              0            1               3          2         0
Oakcrest           0           1              0            0              27          0         0
Spruce             0           0              0            0               1          0         0
34street           0           0              0            2              36          9         0
Edison             0           0              0           10              78         14         4
Tec2               0           0              0           10              29          9         1
Syracuse           0           0              0            4              39         12         0
Tec1               0           0              0            0              22         11         2
Balboaterr         0           1              3            5              53         30        18
Montanosa          0           0              0            2               0          8         2
Solanadrive        0           0              0            5               1         16         7

With this ordering of the original abundance data, you can see how the different sites (rows) might lie along some environmental gradient. However, this is inferred only from the ordering of species abundances among the sites. No environmental variable has been included in this analysis.

Answers

library(MASS)

# 1. Download and inspect
x <- read.csv(url("https://www.zoology.ubc.ca/~bio501/R/data/rodent.csv"), 
        stringsAsFactors = FALSE)
rownames(x) <- x$site
x
##                    site Rt.rattus Mus.musculus Pm.californicus Pm.eremicus
## Florida         Florida         0           13               3           1
## Sandmark       Sandmark         0            1              57          65
## 34street       34street         0            4              36           0
## Balboaterr   Balboaterr         0            4              53           1
## Katesess       Katesess         0            2              63          21
## Altalajolla Altalajolla         0            1              48          35
## Laurel           Laurel         0           11               0           0
## Canon             Canon         0           16               0           0
## Zena               Zena         3            8               0           0
## Baja               Baja         1            2               0           0
## Washington   Washington         0            9               0           0
## Solanadrive Solanadrive         0            3               1           0
## Syracuse       Syracuse         0            4              39           0
## 32streetsth 32streetsth         1            3               0           0
## 60th               60th         0           11               0           0
## Juan               Juan         0            4               0           0
## Acuna             Acuna         3            0               0           0
## Edison           Edison         0            2              78           0
## Spruce           Spruce         0            0               1           0
## Oakcrest       Oakcrest         3            0              27           1
## 54street       54street         2            1               0           0
## Titus             Titus         0            3               0           0
## Montanosa     Montanosa         0            0               0           0
## Elmac             Elmac         1            0               0           0
## 32streetnth 32streetnth         0            5               0           0
## Tec1               Tec1         0            0              22           0
## Tec2               Tec2         0            0              29           0
## Delmarmesa   Delmarmesa         0            0              10           1
##             Rs.megalotis N.fuscipes N.lepida Pg.fallax M.californicus
## Florida                1          2        0         0              0
## Sandmark               9         16        8         2              3
## 34street               2          9        0         0              0
## Balboaterr             5         30        0        18              3
## Katesess              11         16        0         0              0
## Altalajolla           12          8       12         2              2
## Laurel                 0          0        0         0              0
## Canon                  0          0        0         0              0
## Zena                   0          0        0         0              0
## Baja                   0          0        0         0              0
## Washington             0          0        0         0              0
## Solanadrive            5         16        0         7              0
## Syracuse               4         12        0         0              0
## 32streetsth            0          0        0         0              0
## 60th                   0          0        0         0              0
## Juan                   0          0        0         0              0
## Acuna                  0          0        0         0              0
## Edison                10         14        0         4              0
## Spruce                 0          0        0         0              0
## Oakcrest               0          0        0         0              0
## 54street               0          0        0         0              0
## Titus                  0          0        0         0              0
## Montanosa              2          8        0         2              0
## Elmac                  0          0        0         0              0
## 32streetnth            0          0        0         0              0
## Tec1                   0         11        0         2              0
## Tec2                  10          9        0         1              0
## Delmarmesa             0          1        0         0              0
# 2. Correspondence analysis
z <- corresp(x[, -1], nf = 2)
names(z)
## [1] "cor"    "rscore" "cscore" "Freq"
z$cor
## [1] 0.8639130 0.6775561
# 3. Plot results
biplot(z, las = 1, xlab = "First axis", ylab = "Second axis")

# 4. Species (column) scores
z$cscore
##                       [,1]        [,2]
## Rt.rattus        3.0167376  7.82037720
## Mus.musculus     2.6501948 -1.14326455
## Pm.californicus -0.3554966  0.07497694
## Pm.eremicus     -0.4783495  0.03669773
## Rs.megalotis    -0.3653138 -0.06211601
## N.fuscipes      -0.3163246 -0.11308540
## N.lepida        -0.5170769  0.04102837
## Pg.fallax       -0.3178842 -0.15209533
## M.californicus  -0.4443527 -0.02489329
# 5. Drop introduced species
x1 <- x[ , -c(2,3)]
x1 <- x1[rowSums(x1[, -1]) > 0, ]

# 6. Correspondence analysis on native species
z1 <- corresp(x1[, -1], nf = 2)
z1$cor
## [1] 0.5436941 0.4040247
# 7. Plot results
biplot(z1, las = 1, xlab = "First axis", ylab = "Second axis")

# 9. Order species and sites according to position along the first axis
x2 <- x1[, -1][order(z1$rscore[,1]), order(z1$cscore[,1])]
x2
##             N.lepida Pm.eremicus M.californicus Rs.megalotis Pm.californicus
## Sandmark           8          65              3            9              57
## Altalajolla       12          35              2           12              48
## Katesess           0          21              0           11              63
## Delmarmesa         0           1              0            0              10
## Florida            0           1              0            1               3
## Oakcrest           0           1              0            0              27
## Spruce             0           0              0            0               1
## 34street           0           0              0            2              36
## Edison             0           0              0           10              78
## Tec2               0           0              0           10              29
## Syracuse           0           0              0            4              39
## Tec1               0           0              0            0              22
## Balboaterr         0           1              3            5              53
## Montanosa          0           0              0            2               0
## Solanadrive        0           0              0            5               1
##             N.fuscipes Pg.fallax
## Sandmark            16         2
## Altalajolla          8         2
## Katesess            16         0
## Delmarmesa           1         0
## Florida              2         0
## Oakcrest             0         0
## Spruce               0         0
## 34street             9         0
## Edison              14         4
## Tec2                 9         1
## Syracuse            12         0
## Tec1                11         2
## Balboaterr          30        18
## Montanosa            8         2
## Solanadrive         16         7

Classify images with CNNs

In this exercise you’ll make a CNN to distinguish images of dogs from cats. This is not as easy as it sounds. The data are a subset of the Kaggle Dogs vs. Cats competition, and the dogs and cats are in different poses and on different backgrounds. For this exercise we’re using low-resolution grayscale images. I’ve downsampled the images to 50x50 pixel black and white images to keep the computations manageable for thw workshop.

See the R tips AI page for hints on how to construct and run a CNN model. The R tips Data page has additional information on how to manipulate images in R.

For this workship I’ve created a training data set of 10,000 images named train_x, and a corresponding vector train_y indicating whether each image is of a cat (y = 0) or dog (y = 1). I’ve also made a second, test data set of 2000 images named test_x, and a corresponding vector test_y indicating whether the image is of a cat (0) or dog (1). The purpose of the test data is to see how well our trained CNN model performs.

To begin, you’ll need to install the keras package and also the imager package. See the R tips AI page for information on how to accomplish the keras install on the Mac. I haven’t succeeded in installing it on Windows, so Widows users should use Google Colabs instead.

  1. On Google Colabs, you’ll need to reinstall the packages every time you start a session. It will take a while, as much as 10 minutes, because it also installs a bunch of other packages at the same time.
    install.packages("keras")
    install.packages("imager")
    
  2. Load the packages to run (do this in both Google Colabs or on the Mac).
    library(keras)
    library(imager)


Load the training data

The files are located on the Zoology server. The 10,000 cat and dog images are stored in train_x, and the corresponding vector train_y indicating whether each image is of a cat (0) or dog (1). Run the following commands to load the data into your R session.

load(url("https://www.zoology.ubc.ca/~bio501/R/data/train_x.rdd"))
load(url("https://www.zoology.ubc.ca/~bio501/R/data/train_y.rdd"))

The grayscale images are stored in an array with three dimensions. The second and third dimensions are the height and width of each image (50 x 50 pixels), and the first dimension is the number of images. The images were originally stored as integers between 0 and 255 but I have rescaled them to lie between 0 and 1. Enter train_x[1, , ] to see the first image in the training set. train_y is a vector of 0s and 1s indicating whether each image is of a cat or dog.

dim(train_x)
## [1] 10000    50    50
# Show the top left few pixels of the first image
train_x[1, , ][1:5,1:5]
##           [,1]      [,2]      [,3]      [,4]      [,5]
## [1,] 0.3786405 0.4398693 0.4381046 0.4497255 0.5277778
## [2,] 0.3372288 0.3801699 0.3894118 0.4175686 0.5414118
## [3,] 0.3518954 0.3434641 0.3513072 0.4909150 0.4553595
## [4,] 0.3704444 0.3669673 0.3684314 0.4181961 0.4054248
## [5,] 0.3934248 0.4020261 0.3901961 0.3529804 0.3692680
# Show the first few true classifications
head(train_y)
## [1] 0 0 1 1 1 0

To plot image i in the training set, use the following commands (set i to any integer between 1 and 10000). The image is stored as a matrix and must be converted to a cimg object to plot with the imager package. It also has to be transposed with t() to view in the right orientation The text() command labels the image with the corresponding classification.

i <- 1
x1 <- t(train_x[i, , ])
plot(as.cimg(x1), axes = FALSE)
text(x = 5, y = 2, labels = (c("cat", "dog")[train_y[i] + 1]), col = "firebrick", cex = 1.5)
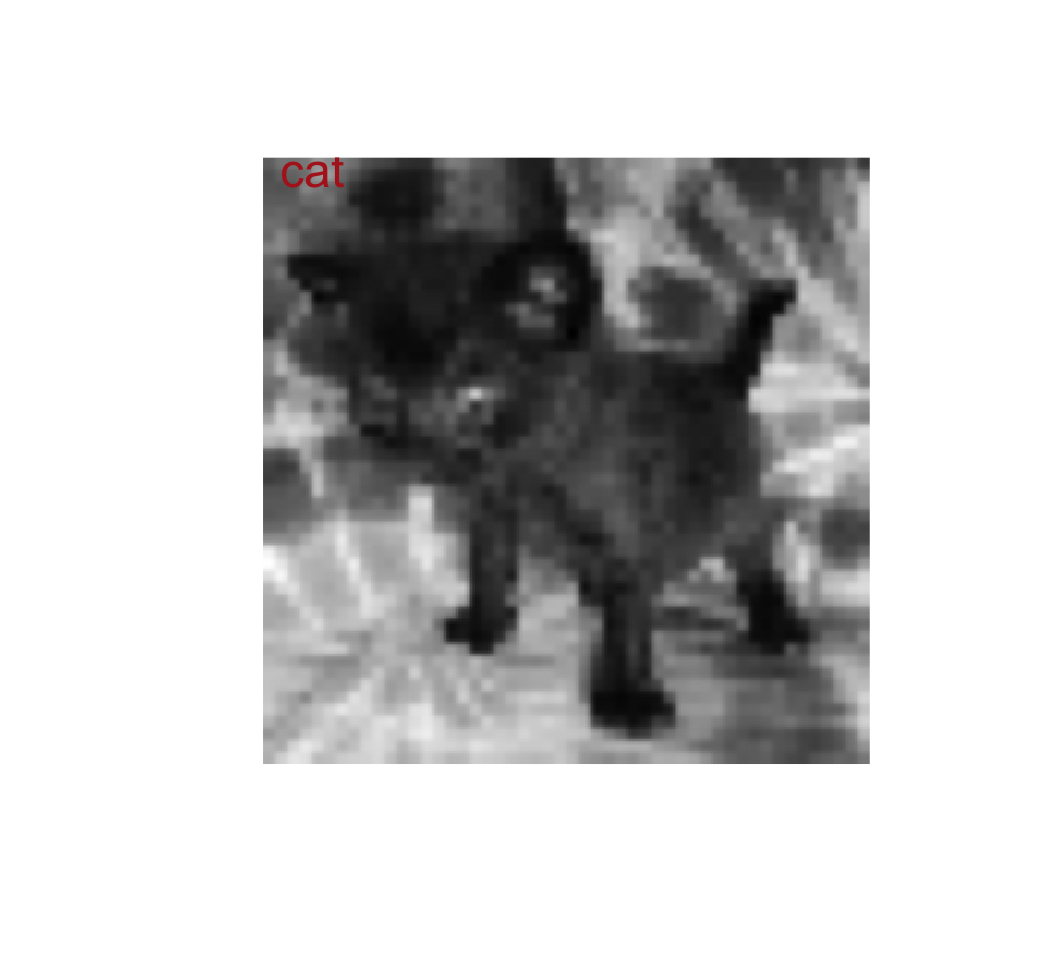

Load the test data

Test images are stored the same way but there are only 2000 images.

load(url("https://www.zoology.ubc.ca/~bio501/R/data/test_x.rdd"))
load(url("https://www.zoology.ubc.ca/~bio501/R/data/test_y.rdd"))


Reshape the images

The image pixel numbers have already been rescaled to lie between 0 and 1 (from the original range of 0 to 255), so nothing to do here. However, the image arrays need to be reshaped.

  1. Even though a grayscale image has just one channel, for consistency the keras package expects it to be coded with three dimensions rather than just the two for height and width, with the last dimension a 1 (rather than a 3 as for an RGB color image). Reshape train_x and test_x to put them in the required format. See the R tips AI page for help.

  2. For the CNN, the response variables for the training and test data must be converted to binary class matrices. Reshape train_y and test_y to put them in the required format.

Answers

# 1. Reshape images
# grab the oringinal array dimensions
dims_train <- dim(train_x)
dims_test <- dim(test_x)

# Reshape arrays
train_x_reshape <- array_reshape(train_x, c(dims_train, 1))
test_x_reshape <- array_reshape(test_x, c(dims_test, 1))

# 2. Convert response variables to binary class matrices
num_classes <- length(unique(train_y))
num_classes
## [1] 2
train_y_reshape <- to_categorical(train_y, num_classes)
test_y_reshape <- to_categorical(test_y, num_classes)
head(train_y_reshape)
##      [,1] [,2]
## [1,]    1    0
## [2,]    1    0
## [3,]    0    1
## [4,]    0    1
## [5,]    0    1
## [6,]    1    0


Make the CNN

  1. Construct a CNN model. Ask ChatGPT for help if you need it. You can follow the example on the R tips page, but you’ll need to change the input shape from 28 x 28 x 1 to 50 x 50 x 1.

  2. Configure the model. You can follow the example on the R tips page, but you’ll need to change the loss function to binary_crossentropy because there are only two categories here rather than 10 in that example.

  3. Finally, fit the model to the training data. You’ll need o choose the batch size and the number of epochs. Too may epochs can take time and lead to overfitting. Too few can lead to reduced accuracy. You can follow the example on the R tips page, but be careful with the names of the reshaped training data set.

  4. Plot the training history. Focus on the accuracy of the model applied to the validation portion of the data with increasing number of training epochs. It should rise and flatten. A decrease at later epochs will indicate overfitting. How high is the accuracy of the model on the validation data after all epochs? Don’t be disappointed if it’s not very high. The images are low resolution and grayscale.

  5. Test the accuracy of the model on the test data set.

  6. Make predictions on the test data set and compare them with the true classification.

  7. Check out a couple of the images that were misclassified. Can you see how the CNN might have been confused?

  8. If you brought in a photo of your own cat or dog, let’s see what your model predicts! You’ll need to import the image and then transform and reshape the image following the instructions on the R tips Data page. If you are using Google Colabs, you’ll need to upload the image to the session directory, as follows: 1) Click on the folder icon in the left sidebar to open the Files panel. 2) Click the “Upload” icon (rectangle with arrow) at the top of the Files panel. 3) Select your file. It will temporarily upload to a folder called “content” in your session directory. 4) Now you can access the file in your R code using the path “/content/filename” or just “filename” worked for me too.
    If you didn’t bring an image, you can try your model on a photo of my dog instead. It is already resized, converted to grayscale and transposed.

    pip <- load.image("https://www.zoology.ubc.ca/~bio501/R/data/pip_transposed.jpg")
    dimpip <- dim(pip)
    dimpip
    
  9. You’ll need to reshape your image to the same dimensions as the training data set. For example, if you used pip, the command is as follows.

    pip_array <- array_reshape(as.array(pip), c(1, dimpip[1], dimpip[2], 1))
    dim(pip_array)
    
  10. Now you can make a prediction on your image. The result will be a vector of probabilities that the image is a cat or a dog, in that order. For example, if you used pip, the command is as follows. What do you own?

    pip_prob <- predict(my_model, pip_array)
    pip_prob
    

Answers

The solution below used a model and parameters similar to the one on the R tips page but fewer layers and more epochs. If you happened to build the same model as mine, your results will differ from those shown here because there are multiple sources of randomness in the training process (initialization of weights, the gradient descent process, the partitioning of training and validation sets, etc).

# 3. Build model
image_shape <- c(50, 50, 1)

# Initialize
my_model <- keras_model_sequential()

# Add layers
my_model <- layer_conv_2d(my_model, filters = 32, kernel_size = c(3, 3), 
              activation = 'relu', input_shape = image_shape)
my_model <- layer_max_pooling_2d(my_model, pool_size = c(2, 2))
my_model <- layer_conv_2d(my_model, filters = 64, kernel_size = c(3, 3), 
              activation = 'relu')
my_model <- layer_max_pooling_2d(my_model, pool_size = c(2, 2))
my_model <- layer_flatten(my_model)
my_model <- layer_dense(my_model, units = num_classes, activation = 'softmax')

# 4. Configure model
my_model <- compile(my_model,
              loss = 'binary_crossentropy',
              optimizer = 'rmsprop',
              metrics = c('accuracy'))

# 5. Fit model to training data
model_fit <- fit(my_model, 
              train_x_reshape, train_y_reshape,
              batch_size = 128,
              epochs = 15,
              validation_split = 0.2)
## Epoch 1/15
## 63/63 - 12s - loss: 0.6848 - accuracy: 0.5491 - val_loss: 0.6578 - val_accuracy: 0.6265 - 12s/epoch - 190ms/step
## Epoch 2/15
## 63/63 - 3s - loss: 0.6426 - accuracy: 0.6336 - val_loss: 0.7509 - val_accuracy: 0.5275 - 3s/epoch - 45ms/step
## Epoch 3/15
## 63/63 - 3s - loss: 0.6166 - accuracy: 0.6630 - val_loss: 0.6070 - val_accuracy: 0.6725 - 3s/epoch - 42ms/step
## Epoch 4/15
## 63/63 - 3s - loss: 0.5926 - accuracy: 0.6861 - val_loss: 0.5819 - val_accuracy: 0.7105 - 3s/epoch - 48ms/step
## Epoch 5/15
## 63/63 - 3s - loss: 0.5709 - accuracy: 0.7122 - val_loss: 0.5818 - val_accuracy: 0.6975 - 3s/epoch - 48ms/step
## Epoch 6/15
## 63/63 - 3s - loss: 0.5558 - accuracy: 0.7230 - val_loss: 0.5712 - val_accuracy: 0.7090 - 3s/epoch - 40ms/step
## Epoch 7/15
## 63/63 - 3s - loss: 0.5405 - accuracy: 0.7311 - val_loss: 0.5454 - val_accuracy: 0.7170 - 3s/epoch - 43ms/step
## Epoch 8/15
## 63/63 - 3s - loss: 0.5272 - accuracy: 0.7414 - val_loss: 0.5460 - val_accuracy: 0.7205 - 3s/epoch - 43ms/step
## Epoch 9/15
## 63/63 - 3s - loss: 0.5165 - accuracy: 0.7525 - val_loss: 0.5686 - val_accuracy: 0.7115 - 3s/epoch - 40ms/step
## Epoch 10/15
## 63/63 - 3s - loss: 0.5056 - accuracy: 0.7614 - val_loss: 0.5249 - val_accuracy: 0.7470 - 3s/epoch - 40ms/step
## Epoch 11/15
## 63/63 - 3s - loss: 0.4976 - accuracy: 0.7676 - val_loss: 0.5673 - val_accuracy: 0.7095 - 3s/epoch - 41ms/step
## Epoch 12/15
## 63/63 - 3s - loss: 0.4908 - accuracy: 0.7653 - val_loss: 0.5257 - val_accuracy: 0.7450 - 3s/epoch - 40ms/step
## Epoch 13/15
## 63/63 - 2s - loss: 0.4859 - accuracy: 0.7720 - val_loss: 0.5586 - val_accuracy: 0.7140 - 2s/epoch - 40ms/step
## Epoch 14/15
## 63/63 - 3s - loss: 0.4729 - accuracy: 0.7769 - val_loss: 0.5213 - val_accuracy: 0.7445 - 3s/epoch - 40ms/step
## Epoch 15/15
## 63/63 - 3s - loss: 0.4677 - accuracy: 0.7831 - val_loss: 0.5434 - val_accuracy: 0.7285 - 3s/epoch - 41ms/step
# 6. Plot training history
plot(model_fit)

# 7. Test model accuracy on the testing dataset
evaluate(my_model, test_x_reshape, test_y_reshape)
## 63/63 - 0s - loss: 0.5435 - accuracy: 0.7240 - 393ms/epoch - 6ms/step
##      loss  accuracy 
## 0.5434689 0.7240000
# 8. Model prediction and comparison with true classification
y_test_probs <- predict(my_model, test_x_reshape)
## 63/63 - 0s - 247ms/epoch - 4ms/step
y_test_pred <- as.vector(k_argmax(y_test_probs))

# "0" is cat, 1" is dog
table(test_y, y_test_pred)
##       y_test_pred
## test_y   0   1
##      0 889 111
##      1 441 559
# 9. Misclassified images
z <- which(test_y == 0 & y_test_pred == 1)
z
##   [1]   33   35   53   77   83   84  123  135  155  160  198  203  205  214  243
##  [16]  248  250  258  295  304  313  342  356  377  382  399  437  456  483  498
##  [31]  535  544  548  552  566  573  576  588  590  604  633  634  637  648  654
##  [46]  665  706  731  768  825  861  877  899  926  927  965  972  980  982  989
##  [61] 1000 1001 1011 1025 1027 1074 1135 1143 1156 1160 1176 1184 1192 1193 1243
##  [76] 1292 1341 1353 1366 1382 1396 1398 1410 1413 1416 1440 1553 1582 1603 1613
##  [91] 1622 1630 1643 1651 1691 1711 1753 1781 1784 1785 1788 1802 1840 1844 1855
## [106] 1861 1874 1891 1918 1941 1949
plot(as.cimg(t(test_x[z[1], , ])), axes = FALSE)

# 10. Load a pet image
pip <- load.image("https://www.zoology.ubc.ca/~bio501/R/data/pip_transposed.jpg")
dimpip <- dim(pip)
dimpip
## [1] 50 50  1  1
# Plot the image
plot(pip, axes = FALSE)

# To view in correct orientation, transpose the matrix and convert to cimg object
plot(as.cimg(t(pip[, , 1, 1])), axes = FALSE)

# 11. Reshape image
pip_array <- array_reshape(as.array(pip), c(1, 50, 50, 1))

# Probabilities pip is cat and dog
pip_prob <- predict(my_model, pip_array)
## 1/1 - 2s - 2s/epoch - 2s/step
pip_prob
##            [,1]      [,2]
## [1,] 0.01790938 0.9820907
 

© 2009-2024 Dolph Schluter